Beginner’s Guide to Candle Making: How to Make Candles at Home
Share
Step-by-Step Candle Making for Beginners
Candle making is a rewarding and creative craft that lets you design candles for relaxation, home décor, or thoughtful gifts. With just a few supplies and some simple steps, you can transform wax and fragrance into something that brings warmth and light to any space.
This guide will walk you through everything beginners need to know—supplies, step-by-step instructions, safety tips, and answers to common questions—so you can start your candle making journey with confidence.
Why Make Your Own Candles?
Store-bought candles can be lovely, but making your own offers unique benefits:
* Personalization – Choose your own scents, colors, and containers.
* Cost-effectiveness – Homemade candles can be more affordable in the long run.
* Creativity – Blend fragrances, experiment with waxes, and design unique looks.
* Quality control – You know exactly what’s going into your candles.
* Stress relief – Candle making is a relaxing and therapeutic craft.
Step 1: Gather Your Supplies
Here’s what you’ll need to get started:
1) Wax – Soy, paraffin, beeswax, or blends. Soy wax is popular for beginners because it’s easy to work with and eco-friendly.
2) Wick – Choose the right size based on your container and wax type (our [Wick Size Guide] can help).
3) Fragrance Oils – Use oils designed for candle making. Start with 1–1.5 oz per pound of wax.
4) Colorants – Candle dye blocks or liquid dye for adding color.
5) Container or Mold – Jars, tins, silicone molds, or other heat-safe options.
6) Double Boiler or Microwave-Safe Container – For melting wax safely.
7) Thermometer – Essential for monitoring wax temperature.
8) Stirring Tool – A wooden stick or spoon dedicated to candle making.
9) Wick Holder – Wick centering devices or chopsticks to hold the wick in place.
10) Adhesive – Wick stickers, hot glue, or putty to secure wicks.
11) Basic Tools – Scissors, tape, and newspaper to protect your workspace.
Step 2: Prepare Your Workspace
Candle making can get messy. Protect your work surface with newspaper or a disposable cover. Make sure your space is well-ventilated and free of clutter or flammable materials.
Step 3: Set Up the Wick
Secure your wick to the bottom of your container with adhesive. Use a wick holder to keep it centered. For molds, thread the wick through the mold opening and secure it straight before pouring.
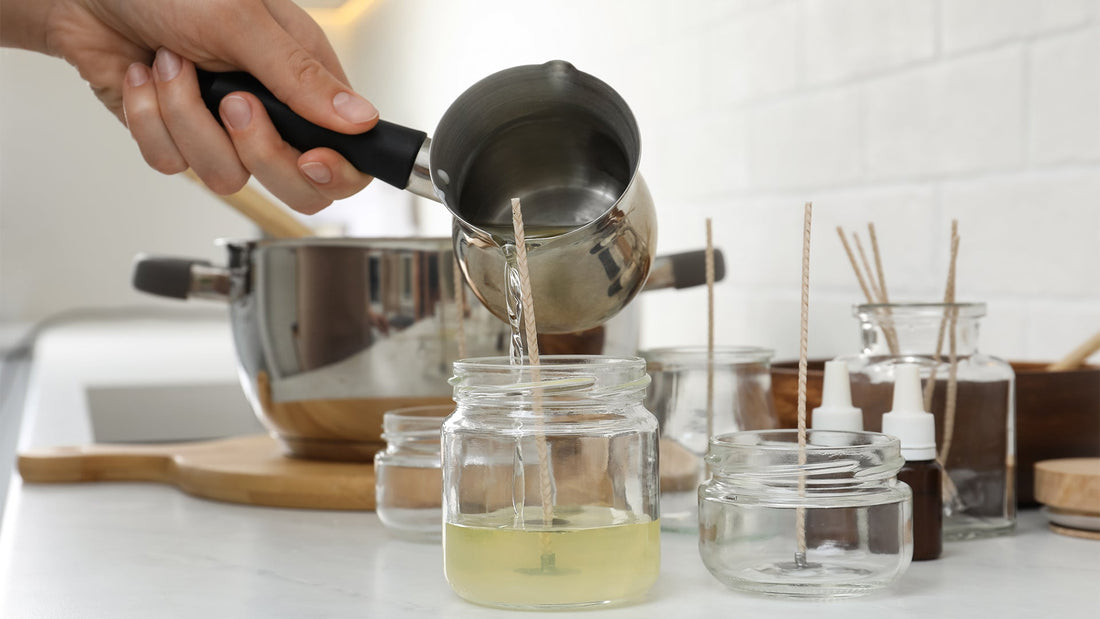
Step 4: Melt the Wax
Melt your wax using a double boiler for steady, controlled heat. If using a microwave, heat in short bursts and stir between intervals. Always monitor with a thermometer—different waxes have different melting and pouring points.
Step 5: Add Fragrance and Color
Once the wax is fully melted:
* Add fragrance oil at the recommended temperature (usually 175–185°F for soy). Stir gently for 1–2 minutes.
* If coloring, add a small amount of dye at a time until you reach the desired shade.
* Remember: A little goes a long way—too much fragrance or dye can affect candle performance.
Step 6: Pour the Wax
Carefully pour the wax into your container or mold, leaving a small gap at the top. Work slowly to minimize air bubbles.
Step 7: Cool and Set
Allow the candle to cool undisturbed. This can take several hours. Avoid moving the candle during this stage to prevent cracks or uneven tops.
Step 8: Trim the Wick
Once fully cooled and solid, trim the wick to about ¼ inch. This helps control the flame and prevents excess soot.
Step 9: Cure Your Candle
For the best fragrance throw, let soy candles cure for at least 1–2 weeks before burning. Paraffin candles may require less time. Curing allows the fragrance and wax to bond fully.
Step 10: Enjoy Your Candle
Light your handmade candle, sit back, and enjoy the glow and fragrance you created!
Safety Tips for Beginners
* Never leave melting wax or burning candles unattended.
* Always melt wax in a safe, controlled environment.
* Use heat-safe containers only.
* Keep your workspace clear of flammable items.
* Don’t overload with fragrance or dye—stick to recommended ratios.
FAQs for Beginner Candle Makers
What’s the easiest wax for beginners?
Soy wax is the most beginner-friendly, with clean handling and consistent results.
How much fragrance oil should I add?
A common starting point is 1–1.5 oz per pound of wax (check IFRA guidelines for each fragrance).
Can I use essential oils instead of fragrance oils?
Essential oils can be used but often don’t throw scent as strongly as candle-specific fragrance oils.
Do candles need to cure?
Yes. Curing improves scent throw, especially in soy candles.
Why is my candle tunneling?
This happens when the melt pool doesn’t reach the edges. Be sure your wick size is correct for your container.
Final Thoughts
Candle making is both an art and a science. With the right supplies, attention to detail, and a bit of practice, you can create candles that are beautiful, fragrant, and uniquely yours.
At Columbus Candle Supply, we carry everything beginners need to get started—soy and paraffin waxes, fragrance oils, wicks, containers, dyes, and more. Whether you’re crafting for yourself or starting a business, we’re here to support your journey.